This is an old revision of the document!
# JTAG access
## Overview
As detailed on the Schematic (released in the FCC documents), the Nabaztag:tag board breaks out the JTAG port. Let's see how to use it to access the CPU to be able to flash and debug some code !
## Hardware
### JTAG probe: BusBlaster
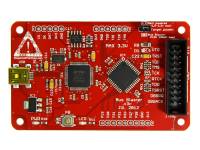
 I think you can use any JTAG probe that's 3.3v compatible, if you have one. If you don't, I recommend the [BusBlaster v3](http://dangerousprototypes.com/docs/Bus_Blaster_v3_design_overview). It's a great board, versatile and cheap; oh ! and it's also open hardware and open source !
 ![]()
On of the best features of the BusBlaster is you can reconfigure the CPLD to emulate any FT2232 JTAG probe. I think it comes pre-programmed with a JTAGkey buffer logic, which should work fine for this application.
_Note_: My BusBlaster (a v4 !) uses a KT-link buffer logic, because I needed the SWD capabilities for another application. If the following steps don't work, try to reprogram the CPLD with a KT-link buffer and try again !
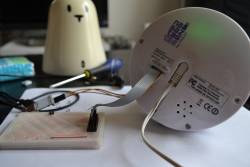
You also need some jumper wires (also called _Dupont wire_ sometimes) F/F to connect the BusBlaster to the Nabaztag
### Nabaztag:tag
Well, of course you need a Nabaztag:tag ( a version 2 ). You also must be ready to open it.
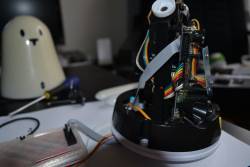
Grab a small flat screwdriver and remove the four screws on the base. You can also use a triangle screwdriver if you happen to have one, I don't.
And this is about it. the JTAG header is on the top left corner of the board.
Pinout is the following (top to bottom):
| Nabaztag Pin | Function | BusBlaster pin |
|---|---|---|
| 1 | 3.3v | VTG (or NC) |
| 2 | Gnd | GND |
| 3 | nTRST | TRST |
| 4 | TDI | TDI |
| 5 | TMS | TMS |
| 6 | TCK | TCK |
| 7 | TDO | TDO |
| 8 | RESETN | TSRST |
## Software: OpenOCD
### Pacth and compile
### Usage
## Pictures
## Links


